With the window out and the area cleaned up, it's time to prepare the new unit and put it in.
First, unpack the new window. Some suppliers have them shrink-wrapped or otherwise protected. All this has to be removed. On vinyl windows there is a movable trim piece on top that can be adjusted to fit the opening better, and sometimes the manufacturer packs other things under there. Mine had a trim piece for the bottom outside of the window to cover the gap caused by the slope in the sill. Some may put a package of screws for fastening the window in place (this one had the screws packed with the instructions, between the lower sash and the screen). While you still have it out, look for the holes the manufacturer provided for the installation screws; this window has 4 on each side. Vinyl windows have the two sashes, set in a vinyl frame with the spring balances in place, ready to go, usually with a screen on the outside surface.

 |
| Next thing is a trial fit. |

 |
Pick it up, line it up and set it in the space and see how it fits. |
 |
| After seeing this, I
chose to put the top trim back on. Then take the window back out. Cut
the bottom trim for the outside to the width you need with snips and
install it. |
 |
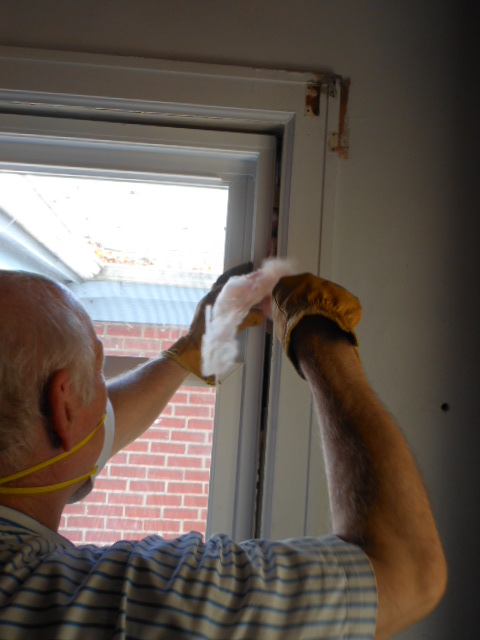
Before installing the window for keeps, put a bead of caulk on the blind stops |
 | |
| where the window will rest, and a bead where the bottom will rest on the sill. | A lot of installers use silicone; I
do not, because time has shown that silicone has a lot of uses, but it
does not stick that well to some woods. Metal, yes; plastics, yes;
wood, iffy. So I use a siliconized acrylic caulk here.
|
 |
Now put the window back in, set it into the caulk and before letting go, grab a screw and cordless drill and put one screw partway into the wood, just to keep it from falling out. Now step back, eyeball how it is centered in the opening, grab a level and check for level and plumb. |

 |
| The next step is shimming. Shims are used on windows and doors because very few houses are built totally level and plumb at all points, and many of the few that are do not stay that way over the years because of foundation settling and lumber shrinkage. So openings are made a bit oversize and the window or door is shimmed to be plumb in the opening. Shims are tapered strips of wood, (traditionally cedar, now often pine and sometimes plastic) usually 1-1/2" wide and 8" or 12" long, very thin at one end and about 1/4" thick at the other. Mostly they are used in pairs to fill the gap between the opening and the window or door unit. (If you have an opening with twisted lumber that has an angle on one side you can use the taper of the shims to correct for that--not a problem on this window.) |
 |
On this window the gap is a quarter inch or less, so I take one shim and break it to get an end in the 1/8"-3/16" range, and put the fat end in the gap at one of the upper screw holes, then put the thin end of the next shim with it. If necessary I break the thin end off until the shims fill the gap. The idea is to have a snug fit. Then I drive a screw through both shims and into the wood of the frame. I repeat this on the other side, and work my way down both sides of the window until the unit is secured at all screw holes, straight on each side, level and plumb. (If an older house is so bad that level and plumb is just not possible, then go for the unit being square with itself and if possible with the outside blind stops.) The outside ends of the shims are butted up against the blind stops on each side. The inside ends stick out into the room. Once the window is secured, we can cut those off. You can use a sharp knife, a wood chisel, or a small saw. I have a Japanese-style handsaw that works well for this. |
 |
| The next step is to insulate the remaining gaps around the window.
It is common now to do this with insulating foam, but you have to make
sure you buy a product that says it is for windows and doors. The
standard spray foam expands too much and can cause a window or door to
bind (I had several jobs when the product came out fixing doors that had
been installed with foam, and the door manufacturers started putting
labels on the doors warning that use of foam would void the warranty).
Now there are foams with less expansion that can be used. But because
Copperhead is sensitive to some chemicals (and yes, this has an effect
on our remodeling everywhere we live) I am using the old-style approach:
fiberglass insulation, often scraps left over from another job. (By the time I use it for this, any chemicals in the fiberglass
have had some time to out-gas, instead of being fresh out of a can.) I
pack it in fairly tightly--compressing fiberglass does increase the
R-value per inch--but not enough to cause the unit to bind.
|
 |
| Finally, it is time to find the inside stop moldings you removed
from the old window at the beginning, and re-install them.
The replacement windows are sized to take up the same amount of room as
the old window, so they should fit just fine. Nail them back in place,
and the window is in. I do plan to add caulk on the outside on the
joint between the blind stop and the vinyl frame, and on the inside
between the vinyl and the molding, but this will be done when I prepare
to paint the exterior and interior of the house.
|

 |
This has been a fairly basic, standard installation. I have done more complicated ones, where the opening was made narrower or shorter (or wider or taller). But this is the basic job, and this is what most window dealers do when replacing older wood double-hung windows. |
This is a good, clear and comprehensive window installation guide. I’m sure many homeowners, especially DIY-ers, will find this very useful. But if the task proves to be a mountain of a challenge, it’s always best to seek the services of a professional for an effective and foolproof window installation.
ReplyDeleteKatie Nicoll
Katie, doing something like this isn't for everybody. I started out as a DIY-er back in the late '70s with our first house, then ended up a contractor doing mostly remodeling, and some new construction. Over the years, there are very few jobs on a house that I haven't done (some of them I would rather not do again). But very little of the work on a house is any kind of rocket science--if it was, most of the guys I have worked with over the last 30 years wouldn't have been in it. On most things, the information is out there, if a person will take the trouble to look. I learned a lot from books, from magazines, from other people, and now the Internet. There are some things (wiring is a major one), where it is essential that you pay attention to small details; a person who can't do that had better hire the work. But on the other end of the scale, in some situations "professional" only means the guy found somebody to pay him for doing it. I have seen good and bad DIY-ers, and good and bad contractors. Even if you don't do it yourself, if you know more about the project, you're less likely to get stuck with a shoddy job.
ReplyDeleteThanks so much for sharing this. I looking to get some window installation in NJ done on my house. I am not that handy so I'll need all of the help that I can get.
ReplyDeleteBasic or not, the way you showed us how to install the window made it so easy for us to understand. Windows are truly essential to have as part of the house.
ReplyDelete- DryTechRoofingCompany.com
There are lots of considerations that you must take in before starting. Things like window measurements, tools to use, safety gloves, and more. Also, skills are essential in this part because removing and installing window frames is quite hard.
ReplyDelete- KrollWindow.com